Archiving old IDE / PATA disks on modern systems using the Linux CLI
Recently, I ran into a situation many may recognise when cleaning up. Over the years, I’ve owned many different computers. I sold or discarded most to recycling, but in those cases, I did take out the drives as I often had no idea anymore about what was on them, promising myself I’d take care of that “later”. Years passed and the disks were just sitting on a shelf in a closet in a small box. Today, I finally got around to backing them up. This is how I approached it. In this situation, I specifically had to backup IDE disks, but the steps should in principle also work with SATA or NVMe.
IDE to SATA converter
The first hurdle to overcome, was mechanical: Modern systems don’t have IDE ports anymore. Therefore, I looked into IDE to USB as well as SATA converters. To eliminate the chance of having to fight crappy USB controllers and drivers, I preferred SATA. I settled on this IDE to SATA converter, costing me around €4,-.
IDE and master/slave jumpers
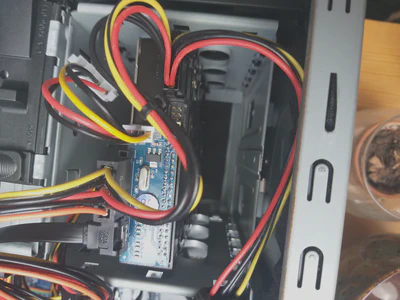
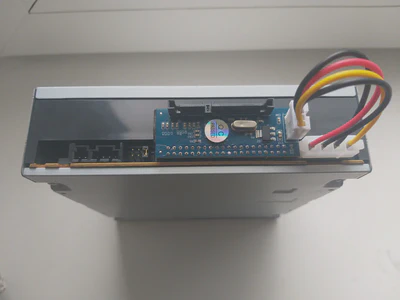
A week after ordering, the converter arrived. I inserted the converter into a drive, converting it from IDE to SATA.


Then, I hooked the drive up to power and one of the SATA ports on the motherboard.
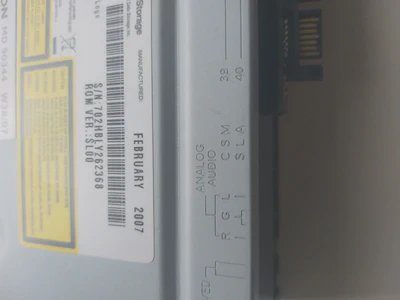
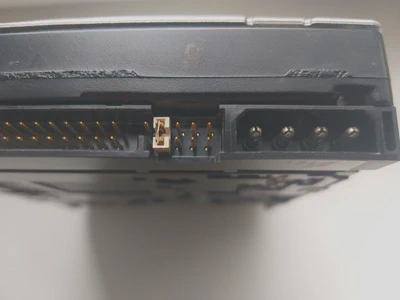
The adapter was detected, but the drive was not available. Diving deep into the back of my memory, I remembered something about jumpers on old IDE drives. Using these jumpers, IDE drives can be set to either “master”, “slave” or “cable select” mode. Usually, these settings are detailed on the sticker or housing of the drive, like on this old DVD drive I have (MA, SL and CS):
Unfortunately, for the first Maxtor drive I wanted to backup, this wasn’t the case. However,luckily I was able to still find a PDF manual online. In the case of the Maxtor drive, the disk turned out to be in “cable select” mode, which didn’t work. Just to be sure, I also tested the “slave” mode, which won’t work either. The disk jumper must be set into “master” mode.
NB: Make sure to power off your computer and disconnect the power cord whenever you swap a disk. IDE disks are NOT hot-swappable.
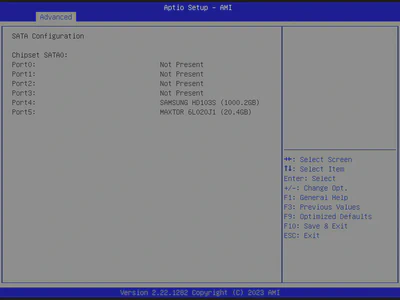
After finding the proper hardware settings, the disk was properly identified, even in BIOS. The SATA controller of the motherboard was set to AHCI mode, which worked fine.
Tmux for background sessions
Imaging disks may take a while, which is why I want to be able to leave them running in the background using tmux.
sudo apt install tmux
Tmux is a terminal emulator. A new tmux session can be started with the tmux command. After then starting a command in there, you can detach from it and move it to run in the background with ‘CTRL’ + ‘B’, then pressing ‘D’. It can later be reattached by running tmux attach. To completely exit a tmux session, simply type exit.
Imaging disks
Start a new tmux session
tmux
Discover which block devices are available on the system.
lsblk
In my case, a root SATA SSD, sda and the old IDE HDD sdb are returned.
➜  ~ lsblk
NAME   MAJ:MIN RM   SIZE RO TYPE MOUNTPOINTS
sda      8:0    0 931.5G  0 disk
├─sda1   8:1    0   953M  0 part /boot/efi
├─sda2   8:2    0   954M  0 part /boot
└─sda3   8:3    0 929.6G  0 part /
sdb      8:16   0    19G  0 disk
└─sdb1   8:17   0    19G  0 part
Most posts I found online suggest first running sha256sum on the disk to create a checksum and then to create an image using dd. However, I don’t trust these disks. They are up to 30 years old and haven’t been used in years.
Therefore, instead I start with a dd command before doing anything else. If the disk crashes after this first copy, so be it, at least I’ll have a backup without a checksum instead of just a checksum and no recovered files at all.
For good measure, I then make a second copy. After creating two copies, I do compare these to the disk and to each other.
The first disk I backed up was a 20GB Maxtor disk. I did this as follows:
if: Input fileof: Output filestatus=progress: Show progress while creating the image.
sudo dd if=/dev/sdb of=maxtor.img status=progress
sudo dd if=/dev/sdb of=maxtor2.img status=progress
sudo sha256sum /dev/sdb
sudo sha256sum maxtor.img
sudo sha256sum maxtor2.img
As you can see below, the two images were created successfully and the checksums match, meaning the copy was succesful.
The disk was copied with ±42 MB/s at the start. Towards the end, copy speeds dropped to ±33MB/s. This probably happens because dd starts at the faster spinning outside of the disk platters and then slowly moves inwards. Imaging the 20GB Maxtor disk took around 10 minutes.
➜  ~ sudo dd if=/dev/sdb of=maxtor.img status=progress

20383384064 bytes (20 GB, 19 GiB) copied, 614 s, 33.2 MB/s
39851760+0 records in
39851760+0 records out
20404101120 bytes (20 GB, 19 GiB) copied, 617.108 s, 33.1 MB/s

➜  ~ sudo dd if=/dev/sdb of=maxtor2.img status=progress
20392750080 bytes (20 GB, 19 GiB) copied, 615 s, 33.2 MB/s
39851760+0 records in
39851760+0 records out
20404101120 bytes (20 GB, 19 GiB) copied, 617.705 s, 33.0 MB/s

➜  ~ sudo sha256sum /dev/sdb
5c62286b077101231a3df210c6135291e1d8843de1a55f3b716d642df100aeed  /dev/sdb

➜  ~ sudo sha256sum maxtor.img
5c62286b077101231a3df210c6135291e1d8843de1a55f3b716d642df100aeed  maxtor.img

➜  ~ sudo sha256sum maxtor2.img
5c62286b077101231a3df210c6135291e1d8843de1a55f3b716d642df100aeed  maxtor2.img
All hashes are the same. Knowing the copy was succesful, I delete the second image.
rm maxtor2.img
Mounting the disk image
From the lsblk command, it became clear that the image of this disk has one partition, sdb1. Let’s determine what type of filesystem it contains and where it’s located on the disk using fdisk.
sudo fdisk -l maxtor.img
For the Maxtor disk, this returned the following information:
sudo fdisk -l maxtor.img
Disk maxtor.img: 19 GiB, 20404101120 bytes, 39851760 sectors
Units: sectors of 1 * 512 = 512 bytes
Sector size (logical/physical): 512 bytes / 512 bytes
I/O size (minimum/optimal): 512 bytes / 512 bytes
Disklabel type: dos
Disk identifier: 0xe1a0e1a0

Device      Boot Start      End  Sectors Size Id Type
maxtor.img1 *       63 39825134 39825072  19G  7 HPFS/NTFS/exFAT
In this output, we can see that the partition /dev/sdb1 starts at sector 63. Now, we need to calculate the offset in bytes. Since each sector is 512 bytes, the offset in bytes is 63×512=32256. Let’s try to mount it as a readonly (ro) filesystem:
sudo mount -o loop,offset=32256,ro maxtor.img /mnt
This returned an error:
➜  ~ sudo mount -o loop,offset=32256 maxtor.img /mnt

mount: /mnt: unknown filesystem type 'ntfs'.
       dmesg(1) may have more information after failed mount system call.
The mount command didn’t have a driver for the ntfs filesystem available. This can be resolved by installing the ntfs-3g package.
sudo apt install ntfs-3g
Let’s retry
sudo mount -o loop,offset=32256,ro maxtor.img /mnt
Now it should work. The contents of the filesystem should be available at /mnt, readonly. This makes it possible to easily explore and sift through the data, without having to worry the old disk might fail.
To unmount the image, run
sudo umount /mnt
Postscript
Having archived all my old hard drives, I am now going to move on to archiving our CDs. From old systems, I collected 6 optical drives. Five use SATA, but one uses IDE, for which the converter will be repurposed.
Closing thoughts
I welcome your feedback and hearing about your experiences! If this post has been useful to you, please feel free to leave a comment down below.